Suneth Writes
Wednesday, January 2, 2013
Saturday, December 29, 2012
RaDiX Library Management System 1.0 for Linux
You can download the RaDiX LMS 1.0 for Linux Distribution here. (16.36 MB)
Follow the steps.
- Extract the downloaded RaDiXLMS 1.0.tar.gz
- Open the terminal (ctrl+alt+t)
- Go to the location where the .tar.gz is extracted using 'cd' commands.
- Enter the following command '$ chmod a+x LibraryManagementSystem.jar' in the terminal.
- You can run the application by double clicking on the LibraryManagementSystem.jar file (Or you can run it with terminal by typing the command '$ java -jar LibraryManagementSystem.jar'. You don't have to follow the earlier step, if you run the .jar using the terminal)
- You can have an idea about the data that are already included, by generating the reports under the Reports tab.
(Note: Please don't change the location of the radixlibrary folder, which contains the database)
Thursday, December 27, 2012
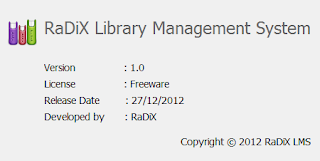
RaDiX Library Management System
This is a simple software to manage a library. (For windows platform)
You don't have to bother about making database connections on your own.
Please try this and, let me know your comments.
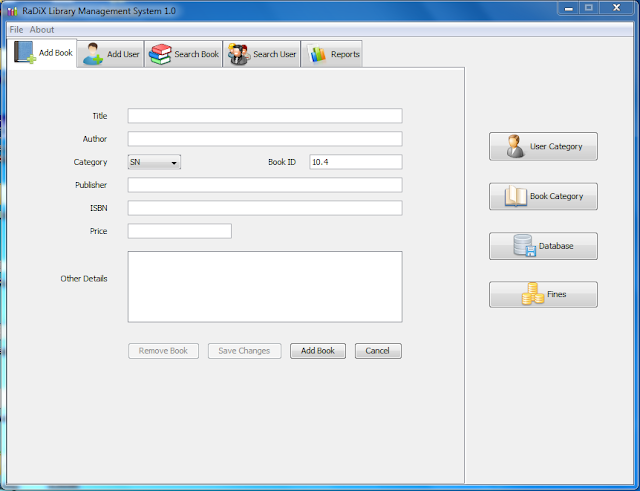
Here, you can find the main interface of the software.
Please go to the Reports tab and generate all the reports. You can have an idea about the sample data, I have entered.
You can download the software from here. (17.66 MB) . (Only 100 books can be added in this version)
If somebody wishes to have an online library management system, please have a look at the following web site.
You don't have to bother about making database connections on your own.
Please try this and, let me know your comments.
- Please install the software in the default path or outside write protected places in your system, since this has database operations.
Here, you can find the main interface of the software.
Please go to the Reports tab and generate all the reports. You can have an idea about the sample data, I have entered.
You can download the software from here. (17.66 MB) . (Only 100 books can be added in this version)
If somebody wishes to have an online library management system, please have a look at the following web site.
Saturday, August 4, 2012
Implementation of a tree structure in OSX - Step 4
Continuation of the tree structure implementation ..
First select Tree Controller object that we created and add these information as below.
Then select the outline view in the MainMenu.xlb then add these information as shown.
This shows that we are binding outline view to the tree controller using the commandName of the TreeNode. (You can refer to TreeNode.m )

After that select Tree Controller object and create the connection to the AppDelegate class. (You need to press ctrl key when creating the connection). Selecct treeController from the menu.

Finally you have completed the implementation.
Then Build and Run the project. (Press Command + R)
You will have this...
First select Tree Controller object that we created and add these information as below.
Then select the outline view in the MainMenu.xlb then add these information as shown.
This shows that we are binding outline view to the tree controller using the commandName of the TreeNode. (You can refer to TreeNode.m )

After that select Tree Controller object and create the connection to the AppDelegate class. (You need to press ctrl key when creating the connection). Selecct treeController from the menu.
After that connect Appdelegate class to the Tree Controller as below. Selecct treeController from the menu.

Then Build and Run the project. (Press Command + R)
You will have this...
I believe that this will need to somebody in someday just like once I needed this .....
Implementation of a tree structure in OSX - Step 3 (NSOutlineView, NSTreeController, NSTreeNode)
Continuation of the tree structure implementation ..
Now we have to add a new class to create nodes for the tree structure.
We shall create a new Objective-C class named "TreeNode". The steps are shown in the screen shots below.


You can see the New class in the project navigator bar.
Now it's time to add relevant codes and make the connections.
Open the newly created TreeNode.h file.
Add the following code.
<TreeNode.h>
 #import <Foundation/Foundation.h>
 @interface TreeNode : NSObject{
   NSString *commandName;
   NSInteger commandLevel;
 }
 @property NSString * commandName;
 @property NSInteger commandLevel;
 +(TreeNode *) commandDataName:(NSString *)commandName commandLevel:(NSInteger)commandLevel;
 @end
<TreeNode.m>
 #import "TreeNode.h"
 @implementation TreeNode
 @synthesize commandName;
 @synthesize commandLevel;
 +(TreeNode *) commandDataName:(NSString *)commandName commandLevel:(NSInteger)commandLevel{
   TreeNode *treeNode = [[TreeNode alloc]init];
   treeNode.commandName = commandName;
   treeNode.commandLevel = commandLevel;
   return treeNode;
 }
 @end
Now command node creation in the AppDelagate.m class. (We added necessary codes for the header file in the previous article)
<AppDelegate.m>
 #import "AppDelegate.h"
 #import "TreeNode.h"
 NSTreeNode *mainCommand;
 NSTreeNode *subCommand1;
 NSTreeNode *subCommand2;
 static NSArray * generateCommandTree(){
   TreeNode *treeNode = [TreeNode commandDataName:@"name" commandLevel:0];
   NSMutableArray *rootNodes = [NSMutableArray array];
   treeNode = [TreeNode commandDataName:@"Command 1" commandLevel:0];
   mainCommand = [NSTreeNode treeNodeWithRepresentedObject:treeNode];
   treeNode = [TreeNode commandDataName:@"Command 1.1" commandLevel:1];
   subCommand1 = [NSTreeNode treeNodeWithRepresentedObject:treeNode];
   [[mainCommand mutableChildNodes]addObject:subCommand1];
   treeNode = [TreeNode commandDataName:@"Command 1.1.1" commandLevel:2];
   subCommand2 = [NSTreeNode treeNodeWithRepresentedObject:treeNode];
   [[subCommand1 mutableChildNodes]addObject:subCommand2];
   treeNode = [TreeNode commandDataName:@"Command 1.2" commandLevel:1];
   subCommand1 = [NSTreeNode treeNodeWithRepresentedObject:treeNode];
   [[mainCommand mutableChildNodes]addObject:subCommand1];
   [rootNodes addObject:mainCommand];
   return rootNodes;
 }
 @implementation AppDelegate
 @synthesize window = _window;
 - (void)applicationDidFinishLaunching:(NSNotification *)aNotification
 {
   // Insert code here to initialize your application
 }
 - (void)awakeFromNib{
   [treeController setContent:generateCommandTree()];
   [outlineView reloadData];
 }
 @end
Now we have completed adding necessary codes to the project.
Shall we create necessary bindings in the next article .....
Implementation of a tree structure in OSX -Step 2 (NSOutlineView, NSTreeController)
To continue you need to add an outline view to the main window.
View -> Utilities ->Show Utilities
This will show you utilities tool bar.
Type outline in the search field.
Drag and drop outline view on the main window. After that you can adjust the sizes and change the number of columns of the outline view.
After that the application window will look like this.

In the project navigator bar you can see AppDelegate.h , AppDelegate.m and MainMenu.xlb files.
In AppDelegate.h file you need to add the following code.
 #import <Cocoa/Cocoa.h>
 @interface AppDelegate : NSObject <NSApplicationDelegate>{
   IBOutlet NSTreeController *treeController;
   IBOutlet NSOutlineView *outlineView;
 }
 @property (assign) IBOutlet NSWindow *window;
 - (void)awakeFromNib;
 @end
Next we have to create the bindings between the relevant classes.
We need to add a TreeController class object to the project.
In order to add that, you have to search in the objects library (like you did for outline view).
Drag and drop it to the Placeholder bar in the MainMenu.xlb view.
Above the Tree Controller object, you can find the object that was automatically created for AppDelegate class. We will need the them sooner....

Implementation of a tree structure in OSX - Step 1
I had
the requirement of implementing a tree structure for a command list. Since the
resources available for this specific task is less in the internet, I thought
of sharing this experience. I should thank the blog writers who had posted some
valuable facts related to this.
Since
this is my first article related to Mac OSX app development, I thought of
starting this with some basics too. So, I will publish this as a series of
articles. (Then it will be easy for a non-beginner to skip the basics and go
for the necessary part easily)
Step 1
Create a project in Xcode
File -> New Project
Select Mac OSX -> Application -> Cocoa Application
Add a name (Command Tree) and tick automatic reference counting (for memory management purposes)
Select the destination to save and create the project.
When you finished creating the project you will have the project like this.
We will see further information about this in the next article..
Subscribe to:
Comments (Atom)


